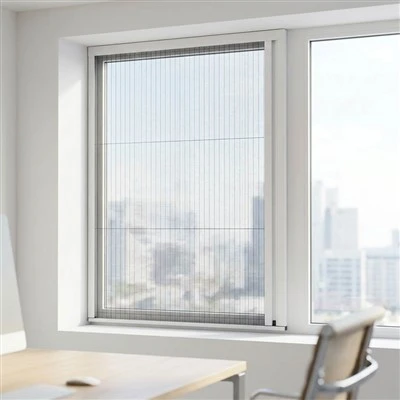
Why Does My Pleated Screen Door Not Close Properly?
A pleated screen door that does not close properly is usually caused by incorrect mesh tension, guide cord imbalance, track contamination, frame misalignment, or component wear. In most cases, the fault can be identified by checking closing resistance, handle position, cord symmetry, mesh geometry, and aluminum frame dimensions before replacing the complete screen unit.
For distributors, installers, and project managers, correct diagnosis matters because a closing problem may originate from installation tolerance rather than a manufacturing defect. A systematic inspection can reduce unnecessary warranty claims, spare-part costs, and site labor.
Problem Analysis: How to Identify the Type of Closing Failure
A pleated screen door is a mechanically coordinated system consisting of pleated polyester mesh, tension cords, upper and lower guide tracks, aluminum extrusion profiles, sliding components, and a magnetic or mechanical closing mechanism.
The first step is to define what "does not close properly" means in physical terms.
| Observed problem | Likely system area | Typical cause |
|---|---|---|
| Screen stops before reaching the frame | Track or guide cord | Debris, cord interference, distorted track |
| Screen reaches the frame but remains partially open | Closing mechanism | Weak or misaligned magnetic contact |
| Handle requires excessive force | Mesh or cord system | Excessive tension or cord friction |
| Mesh folds unevenly near one side | Pleated mesh geometry | Uneven cord tension or incorrect installation |
| Screen moves diagonally | Frame or guide system | Out-of-square opening or profile misalignment |
| Bottom rail does not follow the upper rail | Lower guide | Track obstruction or wheel/slider issue |
| Screen closes but immediately reopens | Magnetic system | Insufficient magnetic force or frame gap |
A technician should record the actual opening width, finished frame width, height, diagonal dimensions, and the position at which resistance occurs. A screen that moves freely for 80% of its travel and jams during the final 100–200 mm requires a different inspection procedure from a screen that has resistance throughout the entire opening cycle.
H3: Check Frame Squareness Within a 2–3 mm Diagonal Difference
Measure both frame diagonals after installation. A significant diagonal difference can force the upper and lower guide systems out of parallel alignment.
For large pleated screen doors, even a small installation error can affect movement because the pleated mesh travels across the full width while being controlled by multiple tension cords.
A practical site inspection should include:
Finished width at top, middle, and bottom
Finished height at left, center, and right
Diagonal measurement from corner to corner
Parallelism between upper and lower tracks
Vertical alignment of side profiles
If the opening width varies substantially between the top and bottom, the aluminum extrusion frame may be under torsional stress after installation.
Technical Reasons: Why a Pleated Screen Door Fails to Close
H3: Uneven Tension Across Multiple Guide Cords
Pleated screen doors generally use tension cords to maintain the geometry of the folded mesh during horizontal movement. If one cord is tighter than another, the moving bar can travel at an angle.
The result may include:
Uneven pleat compression
Increased friction
Handle misalignment
Mesh bunching
Premature cord wear
The cords should produce consistent mesh movement across the screen height. A large difference in tension between upper and lower cords can cause one section of the moving profile to reach the closing position before the other.
Cord tension should therefore be adjusted progressively rather than by applying a large correction to one cord.
H3: Pleated Mesh Width Exceeds the Design Tolerance
Pleated polyester mesh has a fixed manufacturing geometry after pleating and thermal setting. If the mesh width is incorrectly cut, compressed, or installed under abnormal tension, the folded structure may not retract uniformly.
Common indicators include:
Pleats becoming wider near the center
Mesh remaining partially expanded when the screen is closed
One side of the mesh folding faster than the other
Progressive resistance after repeated operation
A supplier should control finished mesh dimensions against the system drawing and check pleat consistency before assembly. For large-format doors, a small dimensional deviation can accumulate across hundreds of pleats.
H3: Upper or Lower Track Contamination
Dust, packaging fragments, aluminum chips, construction debris, and hardened sealant can obstruct the guide track.
This problem is especially common during project installation because the screen may be fitted before surrounding construction work is complete.
Inspect the track for:
Drywall or cement particles
Metal shavings
Protective film fragments
Damaged brush strips
Deformed guide channels
Loose screws entering the track path
The track should be cleaned before adjusting the tension system. Adjusting cords to compensate for a contaminated track can create a second fault after the debris is removed.
Solutions: A Step-by-Step Repair Process
The repair sequence should move from external causes to internal mechanical causes.
Step 1: Remove Debris and Test the Screen Through 100% of Its Travel
Open and close the screen slowly while observing the moving bar. Record where resistance begins.
If resistance occurs at exactly the same position during every cycle, inspect the corresponding section of the upper and lower tracks.
Step 2: Verify the Aluminum Frame Dimensions
Measure:
| Inspection point | Recommended check |
|---|---|
| Top width | Compare with system design size |
| Middle width | Identify frame bowing |
| Bottom width | Identify installation compression |
| Left/right height | Check vertical consistency |
| Diagonals | Identify out-of-square installation |
| Track parallelism | Check movement path |
Do not assume that the screen assembly is defective before confirming the installation opening. A pleated screen manufactured to the correct factory dimensions can still operate poorly when installed in a distorted frame.
Step 3: Inspect Cord Routing and Tension
Remove the relevant cover profile according to the system's assembly design and inspect:
Cord position
Cord wear
Fraying
Pulley condition
Cord crossing
Cord tension balance
Replace visibly damaged cords rather than attempting to reuse a cord with abrasion damage. Repeated movement can cause a partially damaged cord to fail suddenly.
Step 4: Check the Pleated Mesh Geometry
Open the screen to approximately 50% of its travel and compare the pleat pattern from top to bottom.
A correctly operating screen should show relatively uniform pleat compression. Localized bunching often indicates an uneven load distribution rather than a simple magnetic closing problem.
Step 5: Test the Closing Mechanism After Mechanical Adjustment
Only after the screen moves freely should the closing mechanism be tested.
For magnetic systems, inspect:
Magnet polarity
Magnet position
Closing-profile alignment
Contact gap
Loose magnetic inserts
If the mechanical movement is correct but the screen remains 3–5 mm from the closing profile, the problem may be related to magnet positioning or installation alignment.
Need technical drawings, replacement components, or complete system specifications for pleated screen doors? Contact our engineering team for a bulk quotation and spare-parts assessment.
For alternative door and window applications, review ►[Pleated Screen Door] systems and compare them with ►[Retractable Window Screen] solutions for projects requiring different opening mechanisms.
Prevention: How to Avoid Closing Problems Before Installation
H3: Maintain ±2 mm Control During Frame Preparation
The finished installation opening should be checked before screen assembly or on-site cutting. Width variation, height variation, and diagonal differences should be recorded rather than estimated visually.
A screen system installed into an out-of-square opening may operate correctly during initial testing but develop higher friction after repeated use.
H3: Protect Tracks From Construction Debris
Installers should avoid leaving upper and lower tracks exposed during:
Drilling
Wall finishing
Sealant application
Floor work
Packaging removal
Temporary protection can prevent debris from entering narrow guide channels.
H3: Use Defined Tension Adjustment Procedures
Cord adjustment should follow the manufacturer's sequence. Random tightening can transfer excessive load to one section of the pleated mesh.
For project installations involving hundreds of units, distributors and contractors should provide installers with a standardized adjustment procedure covering:
Frame measurement
Track inspection
Cord routing
Tension adjustment
Closing test
Final operational cycle test
Recommendations for Distributors and Project Buyers
When sourcing pleated screen doors for residential or commercial projects, buyers should evaluate the complete operating system rather than comparing only the unit price.
H3: Request Assembly and Installation Documentation
A supplier should be able to provide:
Section drawings
Aluminum extrusion profile specifications
Assembly instructions
Installation tolerances
Spare-parts lists
Cord replacement procedures
Quality inspection requirements
H3: Order Spare Parts Based on Project Volume
Large projects should consider maintaining replacement inventory for high-use components.
| Component | Why stock spare parts? |
|---|---|
| Pleated mesh | Can be damaged during installation |
| Tension cord | Subject to wear and accidental cutting |
| Magnetic inserts | May require replacement after impact |
| Plastic sliders | Can be damaged by incorrect installation |
| End caps | Frequently lost during site handling |
| Handle components | High-contact replacement item |
The correct spare-parts ratio depends on project volume, installation conditions, and the availability of local technical service.
H3: Test Production Samples Before Mass Ordering
For a wholesale order, evaluate samples through repeated opening and closing cycles before approving mass production.
The test should verify:
Closing alignment
Operating force
Mesh folding consistency
Cord stability
Magnetic engagement
Track movement
Frame rigidity
The sample should also represent the actual production configuration, including the specified aluminum profile, mesh color, dimensions, and accessories.
Buyer Checklist Before Reporting a Pleated Screen Door Defect
Before submitting a quality claim, collect the following information:
Order number and production batch
Product model
Finished width and height
Opening width and height
Both diagonal measurements
Installation photographs
Video showing the complete opening and closing cycle
Exact position where resistance occurs
Close-up photographs of cords, tracks, and mesh
Quantity of affected units
Percentage of defects within the project batch
This information allows the supplier to distinguish among manufacturing defects, transportation damage, installation errors, and maintenance issues.
A supplier investigation should not rely only on the statement that the "screen does not close." The physical failure mode must be defined.
Conclusion
Most pleated screen door closing problems can be traced to five areas: frame alignment, guide-track condition, cord tension, pleated mesh geometry, and closing-mechanism position. The fastest repair method is a structured inspection sequence that checks installation dimensions before internal components are adjusted.
For distributors and contractors purchasing pleated screen doors in volume, the supplier should provide measurable installation tolerances, component drawings, assembly procedures, and replacement parts. This reduces site diagnosis time and prevents minor adjustment problems from becoming full-unit replacement claims.
►[Pleated Screen Door] - Request product specifications, technical drawings, bulk pricing, OEM options, and replacement-component support for your next screen door project.
FAQ
What is the most common reason a pleated screen door does not close properly?
Uneven guide-cord tension and frame misalignment are common causes. Check track cleanliness, frame diagonals, moving-bar alignment, and mesh folding before replacing the screen.
Can I repair a pleated screen door by adjusting the tension cords?
Yes, if the cords are correctly routed and undamaged. Adjustment should follow the manufacturer's sequence. Incorrect tightening can increase friction and distort pleated mesh movement.
Can a supplier provide custom-size pleated screen doors for bulk projects?
Yes. OEM suppliers can manufacture systems according to finished width, height, aluminum profile, mesh specification, color, packaging, and project accessory requirements. Buyers should confirm dimensional tolerances before mass production.